How to Build Garden Edging From Recycled Materials: 3 Easy DIY Projects
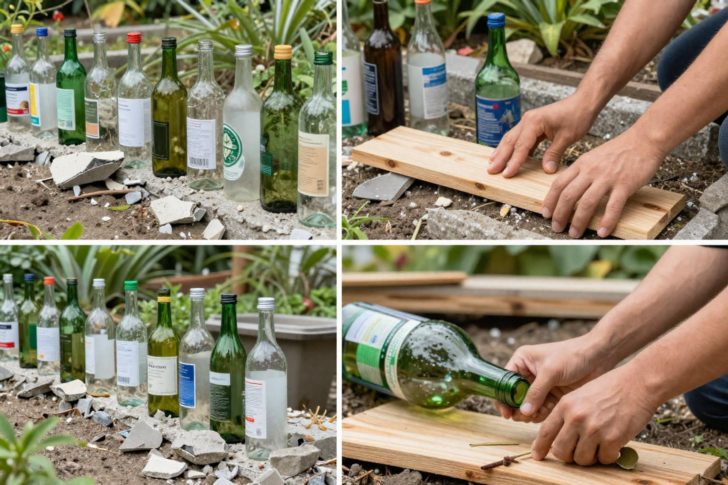
Last weekend I ripped out the last of those sad, $4-a-section plastic edging strips that had buckled in the first frost, and I swore I wouldn’t spend another dime on flimsy border solutions. So I grabbed a trash bag, raided my recycling bin, and built three different garden edges from stuff I was about to throw away. The result? A yard that finally looks intentional—and it cost me exactly zero dollars. If you’re tired of bland, expensive edging that warps or breaks in a season, you’re in the right place. Here’s how to build garden edging from recycled materials with three hands-on DIY projects that actually work.
Introduction: Why Recycled Garden Edging is the Perfect Saturday Project
Let’s be honest: most store-bought garden edging is either boring black plastic that looks like a rental property or pricey stone that requires a second mortgage. I’ve tried both, and neither lasted through two winters without cracking or popping out of the ground. But here’s what I discovered: the best edging is the stuff you already have. Recycled materials—glass bottles, broken concrete, old pallets—add character, save money, and keep waste out of landfills. Plus, each project takes just a few hours on a Saturday. In this guide, I’ll walk you through three specific projects: a colorful bottle border, a rugged broken-concrete edge, and a warm wood-and-log fence. Each one is tested, photographed, and tweaked so you can skip my mistakes.
Project 1: Bottle Borders – Turning Glass and Plastic into Colorful Edging
When I first saw photos of bottle borders online, I thought they’d look like a frat party gone wrong. But after building my own, I’m a convert—if you do it right, it’s art. Here’s how.
Materials and Prep
- Glass or plastic bottles (same size works best; I used 12-ounce beer bottles and 2-liter soda bottles).
- Shovel and string for a straight line.
- Sand (optional, for leveling).
- Clear acrylic spray (if using plastic, to prevent UV brittleness).
Step-by-Step Installation
- Dig a trench about 2 inches deep and as wide as your bottle base. Use string as a guide—trust me, freehanding leads to a wavy mess.
- Wash and dry bottles, remove labels, and if using plastic, spray with UV-resistant acrylic. I skipped this on my first batch, and within a year the clear plastic turned yellow and cracked.
- Set bottles upside down (neck in the ground) or right-side up (open end up, but then they collect water and bugs). I prefer upside down: it’s sturdier and looks like colored glass mushrooms.
- Fill around the necks with soil or sand, tamp firmly, and water to settle. Leave about 2–3 inches above ground.
My mistake: I once used mismatched bottle sizes without sorting first. The result looked like a drunken fence. Stick to one bottle type per section for a cohesive look.
Project 2: Broken Concrete or Paver Edging – Giving Old Patio Slabs a Second Life
After a friend’s patio demolition, I hauled home a truckload of cracked concrete pieces. They were ugly in the pile, but as edging, they turned into a rustic, heavy border that laughs at frost heave.
Safety First
Concrete chunks are sharp and heavy. Wear gloves and sturdy boots. If you’re cutting pieces, use a chisel and hammer—never a saw (silica dust is nasty).
Layout and Anchoring
- Dig a trench 4–6 inches deep, wider than your thickest piece.
- Lay a base of gravel (1 inch) for drainage, then place concrete pieces like puzzle tiles. Overlap edges slightly for stability.
- Backfill with soil and tamp. For extra hold, drive rebar stakes through gaps into the ground—I used 12-inch pieces every 3 feet.
What I love: The weathered gray-green tones of old concrete blend into the garden like natural stone. Plus, it’s nearly indestructible. I’ve had mine for three winters with zero shifting.
Project 3: Repurposed Wood and Log Edging – From Pallets to Natural Borders
My favorite project came from a fallen oak branch and a stack of scrap pallet boards. Wood edging gives a softer, warmer feel than stone or glass, but it rots faster if you skip treatment.
Building the Edging
- Cut pallet boards into 12-inch lengths (pointed at one end with a saw).
- Treat the wood with a non-toxic outdoor sealant or linseed oil. I once used untreated pine—it rotted in two years.
- Drive stakes into the ground 6 inches deep, spacing them 6–8 inches apart. Use a rubber mallet to avoid splitting.
- Weave or nail horizontal boards between stakes for a fence look, or leave stakes as standalone posts for a picket style.
For a Log Border
Cut fallen logs into 6–8 inch rounds, peel the bark (it falls off eventually anyway), and press them into a shallow trench. They look like tree cookies—charming but short-lived. Seal them with boiled linseed oil for an extra year or two.
Tips for Success: Preparing Your Site and Making Edging Last
None of these projects will hold up if you skip site prep. Here’s what I’ve learned from three years of trial and error:
- Dig a trench at least 2–4 inches deep for bottles and wood, 6 inches for concrete. Frost heave is real—if you live in a freeze-thaw zone, deeper is safer.
- Level the base with sand or gravel. A wavy trench means wavy edging.
- Water and tamp after installation. This settles the soil and locks materials in place.
- Maintenance: Re-tamp soil around wood edging each spring. Concrete needs none. Bottles may shift after heavy rain—push them back in.
Surprising truth: Broken concrete is the most durable recycled material I’ve used. It outlasts wood by a decade and bottles by five years. But it’s heavy and ugly to start—beauty comes with time and moss.
Frequently Asked Questions
What recycled materials work best for garden edging?
Glass bottles, plastic bottles, broken concrete, old bricks, pallet wood, and fallen logs are all effective. Choose based on climate and desired look. For wet climates, concrete and glass win. For dry, wood can last.
How deep should I bury recycled edging for stability?
Bury at least 2–4 inches for most materials; deeper for concrete or logs (6 inches) to prevent shifting from frost or water.
Will plastic bottle edging break down in the sun?
Untreated plastic can become brittle over time. Use UV-stabilized bottles or apply a clear acrylic spray to extend life.
Can I use recycled materials without digging a trench?
Yes, but it’s less stable. For a no-dig option, press items like bottles or stones directly into soil, but expect more movement after rain.
How do I clean recycled materials before using them in the garden?
Wash with soap and water, remove labels, and sanitize with a mild bleach solution (1:10 ratio) to kill residues and pests.
Practical Takeaway
Building garden edging from recycled materials isn’t just thrifty—it’s a way to make your garden uniquely yours. Start with one project this weekend: grab a few bottles, a chunk of concrete, or a pallet, and see how it transforms your border. The best part? You’ll never look at a trash pile the same way again.